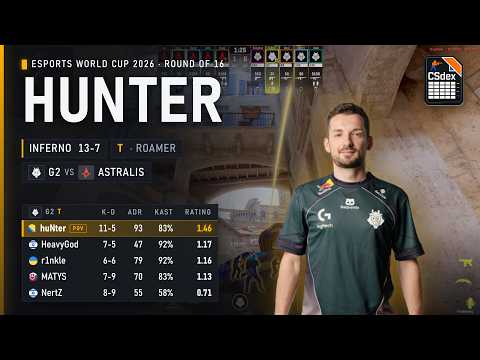
Roamer
Usually starts around T Ramp, Mid, Second Mid, Banana support routes or late Apartments / Arch timings depending on spawn, default structure and the opening plan. Can change responsibilities with the AWPer, Banana players, A extremity or lurker between rounds, especially when the team wants to pressure both sides of the map, punish CT aggression, support utility fights or create late-round uncertainty. It does not belong permanently to A or B, but connects the map by reading pressure, filling gaps and arriving where the round needs impact.
Archive
Role averages
- K/R
- 0.570
- D/R
- 0.733
- ADR
- 65.6
- KAST
- 68.2%
- Avg. |round swing|
- 4.869
About these averages
Metric: all archived map-side rows with the exact Inferno T “Roamer” label. Timeframe: 2024-12-18 to 2026-08-28. Sample: n=4,433.
Source: CSdex V1 aggregate performance archive. Fallback: no fuzzy role-label mapping. Risk: the average describes the archive, not the correct target for every team or round.
Pathings and possibilities from starting Mid / T Ramp
- Support Mid / Top Mid fights with flashes, trades or late contact. (Aggressive)
- Hold passive angles for CT pushes, re-peeks or information plays. (Defensive)
- Reposition toward Banana, Apartments, Short or Arch according to CT reactions. (Situational)
Pathings and possibilities from starting Banana / support routes
- Help take Banana control with utility and trade spacing
- Fall back toward Mid / T Ramp after forcing B utility
- Reconnect into A pressure if CTs over-rotate or leave gaps
Pathings and possibilities from starting Second Mid / Apartments routes
- Support Apps or Boiler control without fully committing to A
- Delay presence to punish rotations or CT information pushes
- Reconnect with Banana / Mid pressure depending on the final call
Mid-round patterns
- Roam between Banana, Mid and Apartments as the flexible support piece, helping the team win the part of the map that matters most in the moment. Decide whether to stay with the pack, hold for aggression or rotate into the weaker side according to CT utility, sound and teammate progress. Teams use it in default rounds where the T side wants to keep both bombsites under pressure before committing.
- Support map-control fights as the second layer, using flashes, trades and spacing to make CT aggression more expensive. The player in the role can turn Banana pressure, Mid control or Apps presence into a real threat without being the first player in. It fits when the team needs stronger trading structure, when CTs are fighting for space or when utility battles decide the round.
- Rotate late after forcing reactions, turning early pressure on one side into a stronger finish on the other. The goal is to read whether CTs have over-rotated, spent too much utility or left an anchor isolated. This is common after Banana control is secured, after A pressure pulls rotations or when the team wants to convert a fake into a clean hit.
- Hold flank and information timings while teammates prepare the final execute. This can punish CT pushes through Banana, Mid or Apartments and protect the bomb carrier before the hit begins. Teams choose it in slow rounds, late-round defaults or situations where losing one timing would collapse the final call.